Creating Virtual Cards
Creating a virtual card is simple, and you control all aspects of how it can be used.
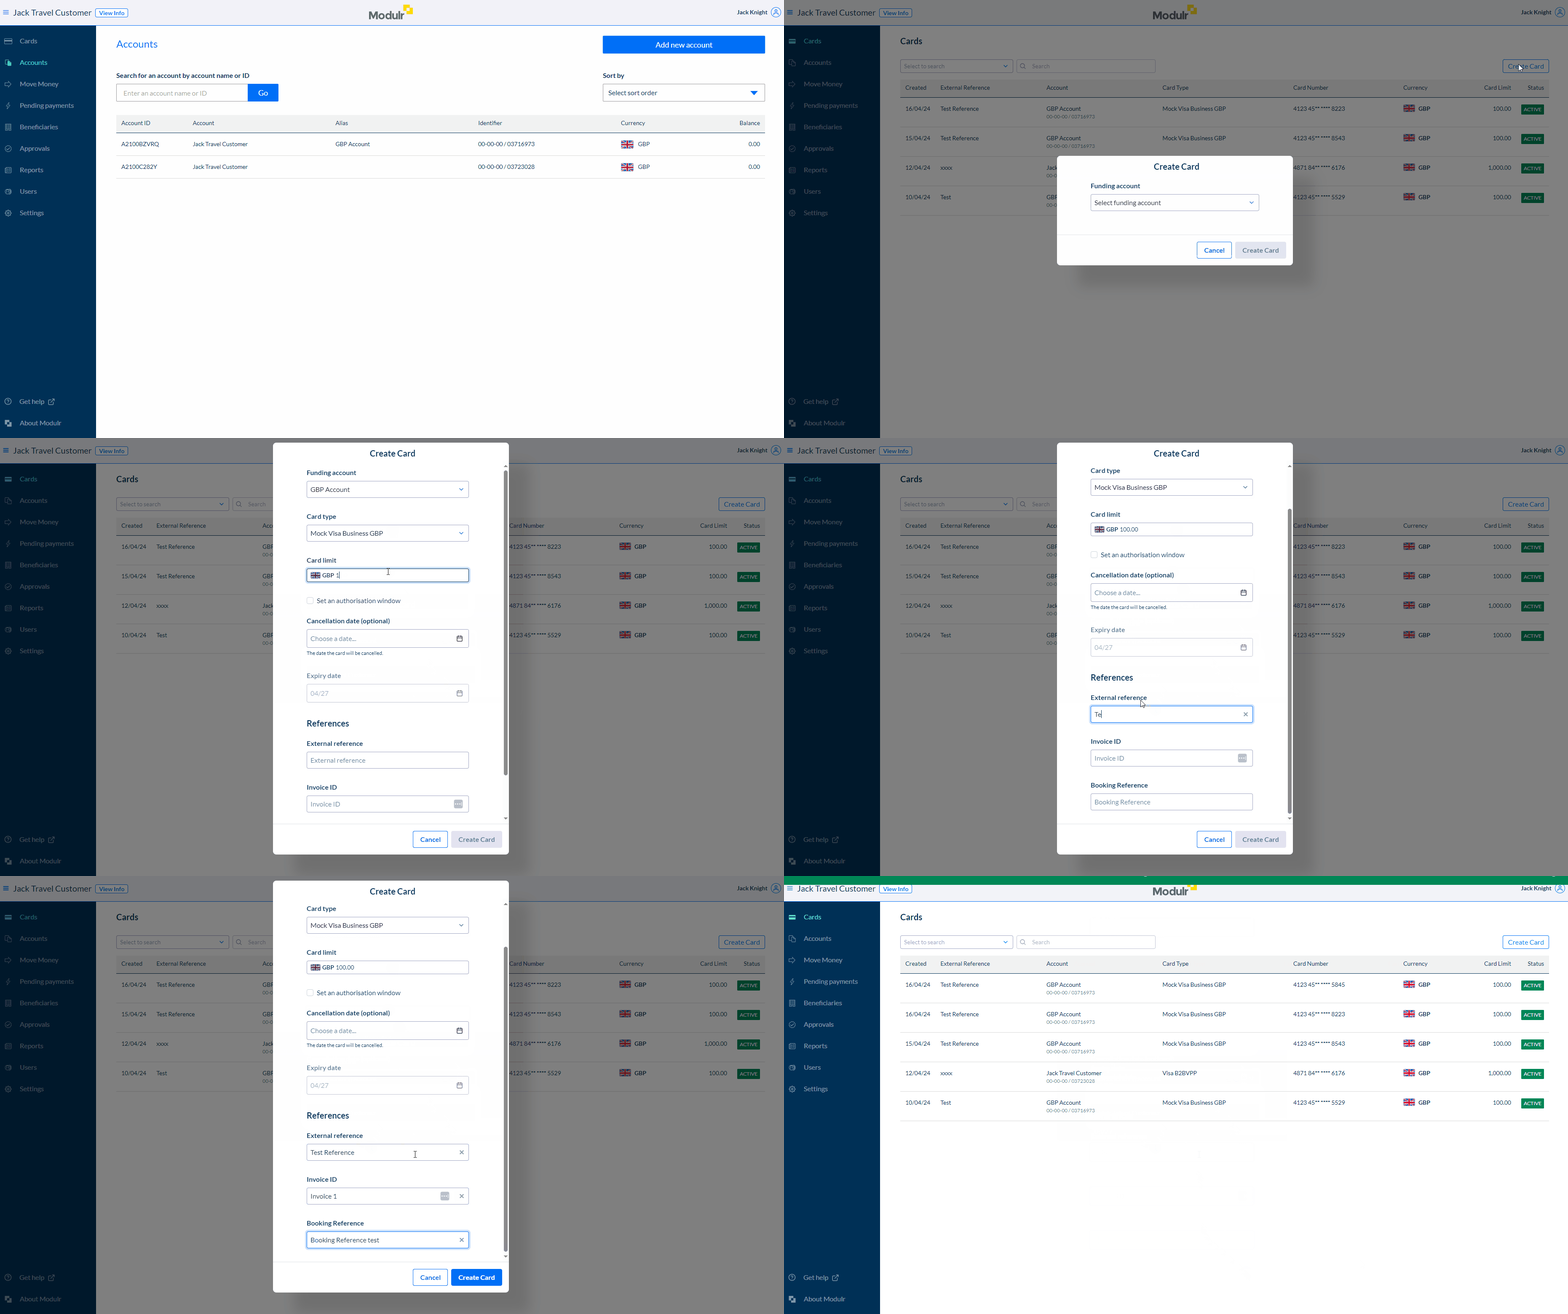
To create a card, navigate to 'Cards' in the side menu and select 'Create Card' from the top right.
You'll need to provide the following fields:
- Funding account that the card is associated with
- Card type e.g. VISA IDX 160 or MC GWP 200
- Card limit
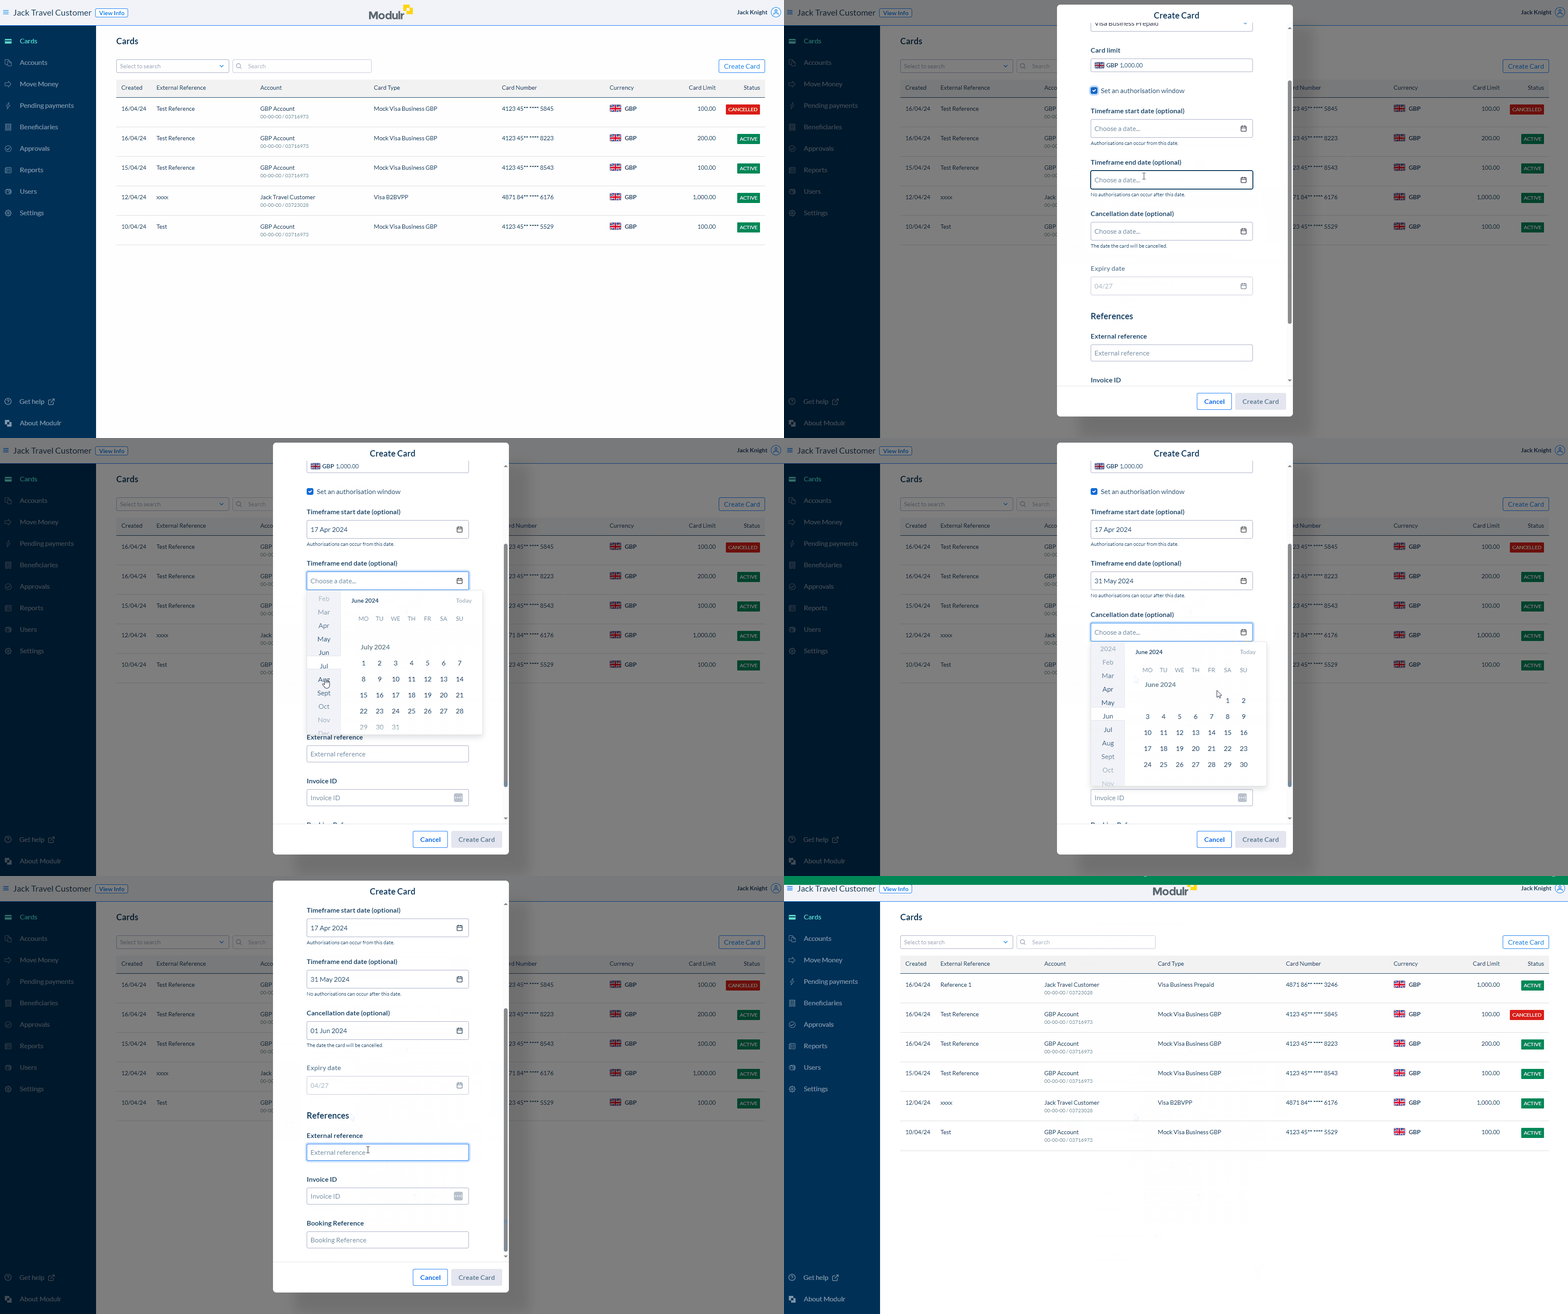
- Authorisation window (Optional)
- Cancellation date (Optional)
- Custom fields
- External reference
After completion of the required fields, select ‘Create Card’ and the card will be created and added to the list of existing cards.
Adding Custom Fields
If Custom Fields are required on a Card, make sure to create the custom field prior to creating the card. For more information on Custom Fields, please go here

Authorisation window
When creating a Virtual Card, you need to specify an Authorisation window. This is a timeframe in which a card can be authorised. This prevents authorisations from taking place on a card outside the agreed timeframe and gives you greater control over the use of the card.
